Power BI DirectQuery with Parameterized Stored Procedure

Issue: You have a parameterized SQL Stored procedure that you want to call in DirectQuery mode. You attempt to use “exec sp parameter” syntax in the Power BI Desktop which works in the Query Editor but it fails to execute due to syntax error when you apply changes.

Workaround: Power BI uses the “select * from exec sp” syntax which doesn’t work. However, if you switch to OpenRowset (you’d need to enable ad hoc distribution queries on the database first), it will work. Other possible workarounds that would probably work is inserting the stored procedure results into a temp table and then select from the table, or wrapping the stored procedure with user-defined table function.

I attach a sample that demonstrates the OpenRowset approach. Download the Stored Procedure Direct Query.zip file (link provided at the end of this post) and rename the from *.zip to *.pbix.

Here is the query text:

= Sql.Database(“elite2”, “AdventureWorks2012″, [Query=”SELECT * FROM #(lf)OPENROWSET(‘SQLNCLI’,’trusted_connection=yes’, ‘exec AdventureWorks2012..uspGetAddress ”” & @City & “”’)”, CreateNavigationProperties=false])

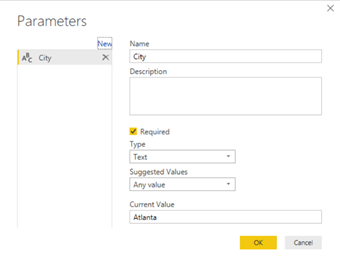
I went one step further and parameterized the stored procedure parameter so that your users can set it conveniently using Edit Queries -> Edit Parameters.

Stored Procedure Direct Query

Understanding Dates in Power BI Quick Measures

As I explained here, Power BI introduced the highly anticipated Quick Measures feature to avoid writing DAX formula for common measures. The feature is still in preview, so make sure you enable it in Power BI Desktop from File, Options and Settings, Options, Preview Features. Many quick measures, such as time intelligence calculations (YTD, QTD, Period Over Period Change, etc.), rely on a date field. The date field could come from a Power BI-provided date hierarchy or a Date table.

Letting Power BI auto-generate date hierarchies is easy but dangerous and limiting. As Chris Webb explains here, Power BI-provided hierarchies could bloat the size of the data model. For example, by disabling them in data in a data model provided by a customer, I was able to reduce the data model size from 300 MB to 30 MB!

Instead, a best practice is to have a Date table. It gives you a control over what date periods you want to include. It also allows you to analyze several fact tables by date in a single visual.

Unfortunately, unlike Power Pivot or Tabular, currently you can’t mark a Date table in Power BI Desktop, even though everything is configured correctly in your model. Attempting to use a date field from a Date table when setting up a quick measure, results in this error.

102317_0006_Understandi1.png

A “primary date column” means a field of a Date type in a Date table marked as such. DAX time intelligence functions only work when several conditions are met by the date column, such as must be at date granularity, must be continuous, cannot have duplicate values, etc. Since PowerBI hasn’t verified that a user supplied date column meets all those conditions, it doesn’t allow users to define Quick Measures to prevent unexpected results if user is unaware that they cannot just pick any date column.

So why the teaser then? A primary date column will work if you import a model with marked Date table from Power Pivot or if you connect to Tabular. While waiting for Power BI to let us mark Date tables, the workaround is to use a Power BI-provided hierarchy (at least to get the formula), and then change the formula manually to reference the Date field in your Date table. For an example of how to do this, refer to my blog that I mentioned at the beginning. Just don’t give up on data tables!

Power BI Bookmarks

So far, Power BI has lacked the ability to navigate to particular report element, such as another report page, and to allow you to show/hide visuals. For example, Tableau allows you to add buttons to pages and navigate to another page on button click. Such navigation capabilities are important for story telling and for emphasizing elements on the screen.

This changes with the October release of Power BI Desktop which brings a set of navigation capabilities, including bookmarks, spotlight, and selection page.

Suppose you have a meeting and walk management through the sales performance of your company. You start with a bar chart. There is a decrease in sales in which you can explain by using the Analyze Increase/Decrease which I discussed here. Now you have two visuals on the same page:

100917_1332_PowerBIBook1.png

But at the beginning of your presentation, you’d want to bring focus on the bar chart, explain the overall trend, and then focus on why sales have decreased (the waterfall chart). You can use bookmarks to achieve this.

  1. Open the new Selection pane (in the View ribbon tab) and hide the Waterfall chart.
  2. While on the View ribbon tab, check the Bookmarks pane. Click Add to bookmark the state of the current page.
  3. Unhide the waterfall chart and create another bookmark.

Now you have two bookmarks that show/hide visuals on the same page. This is conceptually similar to the Power Point animation pane although bookmarks don’t come up with cool entry and exit animations. Now when you present, you can simply use the Bookmarks pane for navigation the way you can use a Table of Contents (TOC) in a Word document.

100917_1332_PowerBIBook2.png

Bookmarks are a welcome new Power BI feature. They are important for data story telling and for improving the navigation experience in a busy report.

Configuring Power Query OData Feeds

Scenario: A customer has implemented a Power BI model that retrieves data by calling the Dynamics CRM OData Feed endpoint. The dataset refresh operation is timing out. They want to increase the timeout setting but unlike connecting to SQL Server, where you can set the timeout duration in the source advanced properties, there is no UI for ODATA.

Solution: If you open the query behind the table, and click the Source step, you’ll see in the Query Editor formula bar the following M code:

= OData.Feed(“https://<tenant>.api.crm.dynamics.com/api/data/v8.1/”)

From the documentation, we realize that OData.Feed can take additional settings and one of them is the Timeout setting that you can pass to the third options argument. For example, you can change the M code to set the timeout to 1 hour:

= OData.Feed(“https://<tenant>.api.crm.dynamics.com/api/data/v8.1/”, null, [Timeout=#duration(0,1,0,0)])

The timeout uses the duration data type which is explained here. Bringing this one step further, you can restrict what records get pulled in the OData.Feed using $filter and also only grab data for the columns you’re using by including the field names in the $select parameters, e.g.

“https://<tenant>.crm.dynamics.com/api/data/v8.1/leads?$filter=<somefield> eq 740110001&$select= <removed list of fields>”

Power BI Premium Reports on Mobile Devices

Can we surface Power BI reports deployed to Power BI Premium Report Server on mobile devices? Yes, and we have three quick options:

  1. Since Power BI reports render in HTML5, they should render in any modern browser.
  2. On iOS and Android devices, consider Power BI Mobile for optimum viewing experience. In Power BI Mobile, go to the Settings and click Connect to Server. Then plug in the report server URL, e.g. http://<servername>/reports. Note that the Power BI Mobile Windows app doesn’t support Power BI Premium Report Server yet. Also, by default your reports will only work if you are on your company intranet or the mobile device connects to your company VPN. To make reports available outside corporate network, you can configure a Web Application Proxy to tunnel in.
  3. For embedding reports on a page, have an HTML page with iframe that request the report by URL passing the embed parameter as explained here.

Power BI can’t reach to your report server? Don’t forget to configure the firewall on the Power BI Premium Report Server to allow inbound connections over port 80, as explained here.