Report Parts
The major new R2 feature that debuts in CTP 3 (November CTP) of SQL Server 2008 R2 Reporting Services is report parts. A report part is a fragment of a report definition that you can publish to the report server to facilitate best practices and reuse. Just like a developer can refactor and share some piece of code, the report author can re-factor a portion of a report and publish it to the server so that end users can use it as it-is. The following report items can be published as report parts:
- Charts
- Gauges
- Images
- Maps
- Parameters
- Rectangles
- Tables
- Matrices
- Lists
A notable exception to this list is page headers and footers which are probably the most likely candidates for reuse but at this point they didn’t make the list. It’s important to note that if a data region uses a report-specific dataset (not a shared dataset), publishing the region as a report part will publish its dependent dataset. Report parts can best understood by example, so let’s walk through the workflow of publishing, using, and changing a report part.
Publishing report parts
You can use the BIDS Report Designer or Report Builder 3.0 to publish a report part. The following steps assume you use Report Designer. Let’s say I decided that the tablix with sparklines, which I discussed in a previous blog, is a darn good and it should be promoted as a published report part that other users could enjoy for educational or other purposes.
- Start by setting the server folder where report parts will be published on deploy. In the project properties, set the TargetReportPartFolder (a new deployment setting) to the name of the server folder, such as Report Parts, or a SharePoint library URL for SharePoint integrated mode.
- With the report open in design mode, expand the Report main menu and click Publish Report Parts. If you use Report Builder 3.0, click the Report Builder 3.0 button (the round button in the topmost left area) and select Publish Report Parts.
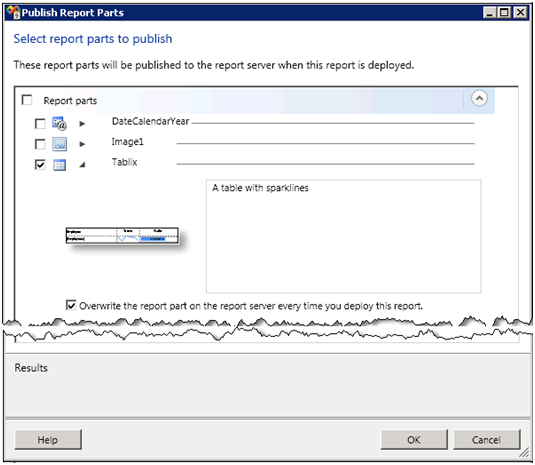
- The Publish Report Parts dialog box shows the items on the report that are supported as report parts. Check the Tablix report item.
- You can rename a report part by double-clicking its name and typing the new name in place. Click the arrow next to it to expand the Tablix section. Enter a description, such as “A table with sparklines” and click OK to close the dialog box.
5. So far, you have configured which items will be promoted to report parts but you haven’t actually published them. To do so, you need to publish the containing report. In Solution Explorer, right-click the report and click Publish.
At this point, you should see messages in the BIDS Output Window informing that the report and the report parts you defined are being published.
Deploying report part ‘Tablix’ to ‘/Report Parts’…
Deploying report parts complete — 1 succeeded, 0 failed, 0 skipped
6. Open Report Manager (or SharePoint) and navigate to the Report Parts folder. You should see the Tablix report part.

If you go to its properties and download its definition, you will see that the file name has an *.rsc extension and that the report part is represented by a ComponentItem element in RDL. Notice also that the report part definition includes all datasets that report part uses. Once the report part is published, you can manage it just like you can manage a published report. For example, you can change its name, description, or security settings.
Using report parts
End users can consume published report parts. Notice that I said “end users” because more than likely this will be the most common scenario. In fact, the BIDS Report Designer doesn’t support referencing report parts, only publishing them. The Report Builder 3.0 has been extended to support this feature.
- Open Report Builder 3.0 and create a blank report.
- Click the Report Builder 3.0 button, click Options and verify that the report server URL is set.
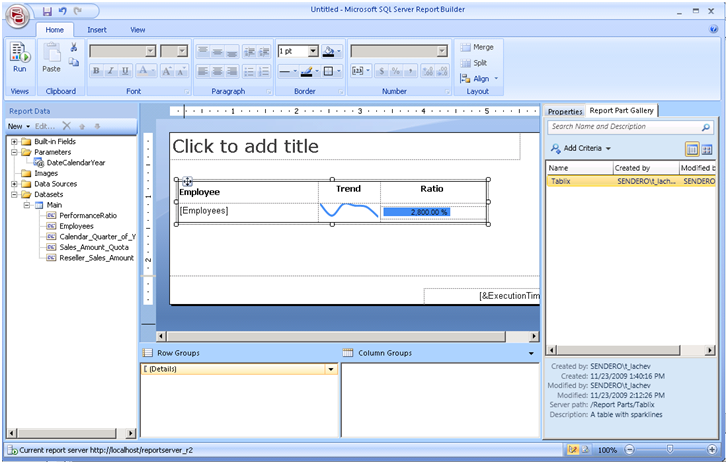
- Click the Report Part Gallery tab of the Properties window. Click the Search button to show all report parts that you have access to.
- Select the Tablix report part and notice that Report Builder 3.0 shows its properties below.
- Drag the Tablix report part and drop it on the report canvas.
Report Builder 3.0 adds the tablix region, the dataset is bound to and report parameters. From here, the report part takes a life of its own. You can make changes to the report as needed including changes to the report part elements. The layout changes you make are not reflected to the published part. If you want to re-publish the changed report part, you can click the Report Builder button and click Publish Report Parts. This will prompt you if you want to re-publish with default settings or review and make changes which will bring you to the Publish Report Parts dialog box.
Changing report parts
The original report part author or another user which appropriate permissions can make changes and re-publish a report part. End users can check if a report part has changed and choose to accept or not the changes. To do this, they have to poll the server for updates. Currently, there is no way for the server to push the changes to all reports who consume the report part in order to force the changes.
- In Report Designer or Report Builder 3.0, open the report that has the Tablix report part. Make changes to the tablix region and deploy the report to re-publish the report part.
- In Report Builder 3.0, open a report that uses that report part.
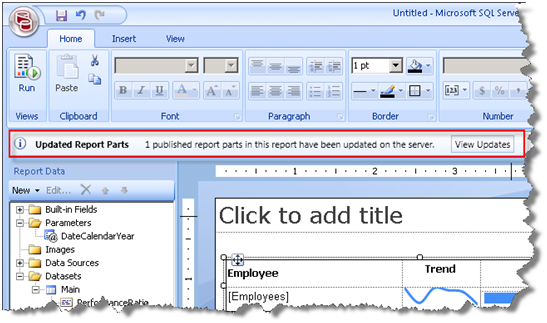
- Click the Report Builder 3.0 button and click Check for Updates. Notice that Report Builder 3.0 detects the changes and displays a message that it has found one changed part.
- Click the View Updates button to see what report parts have changed. In the Update Report Parts dialog box, select the Tablix report part and click the Update button to refresh it.
Report Builder 3.0 replaces the tablix region the published version. However, Report Builder 3.0 keeps the existing dataset and parameters, even if they are not changed, and appends new datasets and parameters each time the part is refreshed. So, if you have a dataset called Main, refreshing a part will add a new dataset called Main2 and bind the refreshed part to Main2.
Report parts are a new feature of SSRS R2. They promote consistency and reuse by letting you re-factor sections of a report and make them available for public consumption.


