MS Guy Does Hadoop (Part 4 – Analyzing Data)
In my previous blog, I talked about Hive. Hive provides a SQL-like layer on top of Hadoop so you don’t have write tons of MapReduce code to query Hadoop and to aggregate and join data. To facilitate working with Hive, Microsoft introduced a Hive ODBC driver (as of this writing, the driver is only available to Hadoop on Azure CTP subscribers). You can use this driver to connect to Hive running on Microsoft Azure or your local Hadoop server. Danny Lee has provided detailed instructions of how to do the former. I’ll show you how to use it to connect to your local Hive server.
Start the Hive Server
If you use the Cloudera VM, the Hive server is not running by default. This service allows external clients to connect to Hive. To start it:
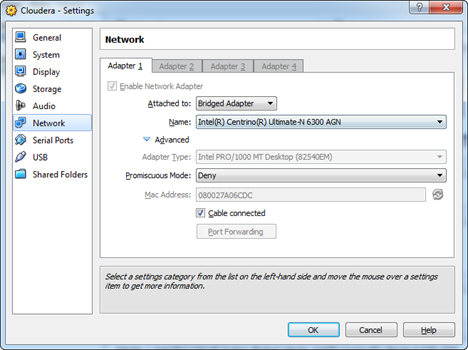
- Configure your Cloudera VM to obtain an IP address on your network. To do so in Oracle Virtual Box, go to the VM settings (Network tab), and change the network adapter to Bridge Adapter.
- Start the Cloudera VM and open the command prompt.
- Note the IP address assigned to the VM:
[cloudera@localhost ]$ ifconfig
[cloudera@localhost ~]$ ifconfig
eth0 Link encap:Ethernet HWaddr 08:00:27:A0:6C:DC
inet addr:192.168.1.111 Bcast:192.168.1.255 Mask:255.255.255.0
UP BROADCAST RUNNING MULTICAST MTU:1500 Metric:1
RX packets:4320 errors:0 dropped:0 overruns:0 frame:0
TX packets:2122 errors:0 dropped:0 overruns:0 carrier:0
collisions:0 txqueuelen:1000
RX bytes:3762720 (3.5 MiB) TX bytes:251411 (245.5 KiB)
3.. If your host OS is Windows, edit the C:\Windows\System32\drivers\etc\host file and add an entry for that address, e.g.:
192.168.1.111 cloudera
4. Ping the VM from the host OS to make sure it responds on the DNS name
C:> ping cloudera
5. Start the Hive server using this command:
[cloudera@localhost ]$ hive –service hiveserver
By default, the Hive server listens on port 10000.
Analyze Data in Excel
There are two ways to bring Hive results in Excel and both options require the Hive ODBC driver:
- You can use the Hive Pane to import data. This option provides a basic user interface, called a Hive Pane, which is capable of auto-generating Hive queries.
- Import Hive tables directly into PowerPivot for Excel.
Using the Hive Pane
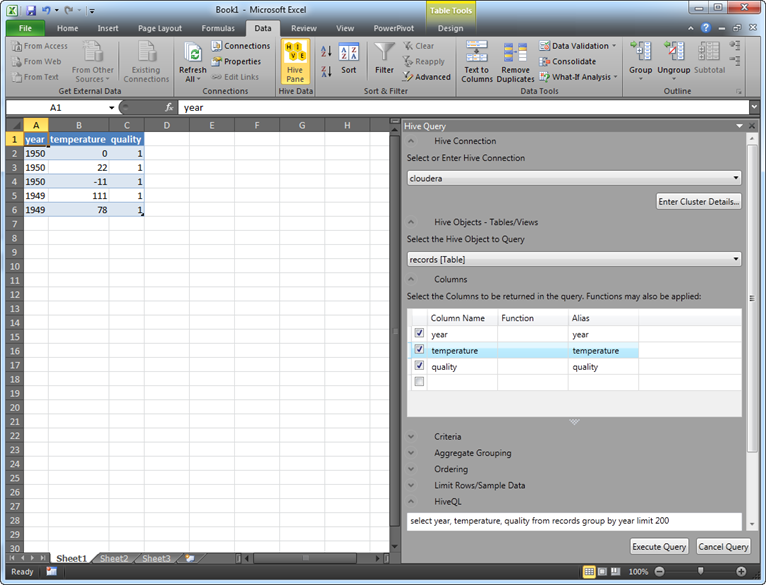
Once you install the Hive ODBC driver, you’ll get a new button in the Data ribbon group called Hive Pane.
- Click the Enter Cluster Details button. In the Host field, enter whatever name you specified in the host file (cloudera in my case). Note that the default port is set to 10000. Click OK. You shouldn’t see errors at this point.
- Expand the Select the Hive Object to Query and select a table. Select which columns you want to bring in. Optionally, specify criteria, aggregate grouping, and ordering. Notice that by default, the driver brings the first 200 rows but you can use the Limit Rows section to overwrite the default.
- Click Execute Query to run the query and generate a table in Excel.
- From there on, you can use the Excel native PivotTable and PivotChart reports to analyze data or link the data to PowerPivot.
Importing Data in PowerPivot
The second option is to bypass the Hive Pane and import a Hive table directly into PowerPivot. To do so, you need to set up a file data source first.
- In Windows, go to Administrative Tools and click Data Sources (ODBC).
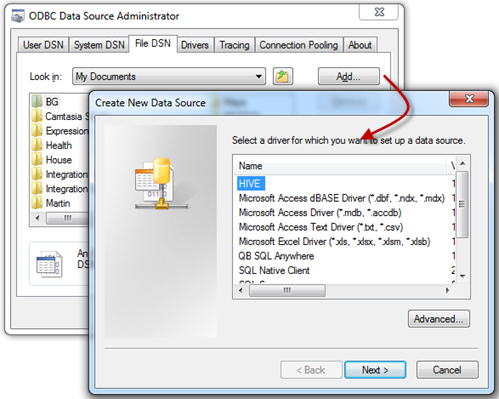
- In the ODBC Data Source Administrator, click the File DSN tab, and then click the Add button.
- In the Create New Data Source dialog box, select the HIVE driver.
- Click Next and save the file data source, such as in the C:\Users\Teo\Documents\My Data Sources folder. Ignore the warning that pops up.
- Back to the ODBC Data Source Administrator (File DSN tab), browse to the folder where you saved the file data source, select it, and click Configure. That will bring you to the same ODBC Hive Setup where you specify the Hadoop server name and port. Close the ODBC Data Source Administrator.
- Back to Excel, click the PowerPivot ribbon menu, and then click the PowerPivot Window.
- In the PowerPivot Window Home tab, click the From Other Sources button in the Get External Data ribbon group.
- In the Table Import Wizard, select the Others (OLEDB/ODBC) option, and then click Next.
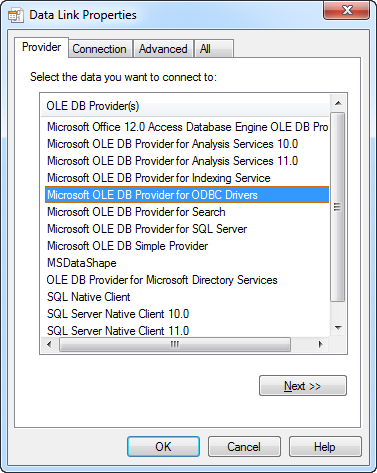
- In the Specify a Connection String, click the Build button to open the Data Link Properties.
- Select the Provider tab and then select the Microsoft OLE DB Provider for ODBC Drivers.

- Select the Connection tab. Select the Use Connection String option, and then click the Build button.
- In the Select Data Source dialog box, browse to the folder where you saved the file data source, select it, and then click OK to return back to the Data Link Properties.
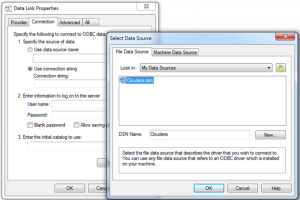
The Connection String field should now be populated with the following text:
DRIVER={HIVE};Description=;HOST=cloudera;DATABASE=default;PORT=10000;FRAMED=0;AUTHENTICATION=0;AUTH_DATA=;UID=;PWD=
10. Click the Test Connection button to verify connectivity. Click OK to return to the Table Import Wizard which should now have the following connection string:
Provider=MSDASQL.1;Persist Security Info=False;Extended Properties=”DRIVER={HIVE};Description=;HOST=cloudera;DATABASE=default;PORT=10000;FRAMED=0;AUTHENTICATION=0;AUTH_DATA=;UID=;”
Follow the wizard, to import the Hive tables as you would with any other data source.

