Running ReportViewer Under Trusted Account
Scenario: You have an Internet-facing web application that uses the Visual Studio ReportViewer control to render reports. The application takes care of authenticating the users. You want all report requests to the report server to go under a single (trusted) Windows account. There are at least two approaches to implement this scenario:
Basic Authentication
You can configure ReportViewer for basic authentication by implementing the Microsoft.Reporting.WebForms.IReportServerCredentials interface, as follows:
[Serializable]
public class MyReportServerCredentials : IReportServerCredentials
{
public MyReportServerCredentials()
{
}
public WindowsIdentity ImpersonationUser
{
get
{
return null;
}
}
public ICredentials NetworkCredentials
{
get
{
return new NetworkCredential(
ConfigurationManager.AppSettings[“reportUser”],
ConfigurationManager.AppSettings[“reportPassword”]
, “<your domain here>” – comment out this line if a domain account is used as a trusted account
);
}
}
public bool GetFormsCredentials(out Cookie authCookie, out string user, out string password, out string authority)
{
authCookie = null;
user = null;
password = null;
authority = null;
return false;
}
}
Specifically, you need to implement the NetworkCredentials property of IReportServerCredentials. In my case, I read the trusted account credentials from web.config. Once IReportServerCredentials is implemented, you need to configure ReportViewer to use it. This takes one line of code:
reportViewer.ServerReport.ReportServerCredentials = new MyReportServerCredentials();
The advantage of using IReportServerCredentals if flexibility. You can retrieve the account credentials from any place, such as security service, configuration file, database, etc. In addition, the impersonation is scoped for ReportViewer only. Other network calls made by the applications are unaffected.
Process Identity
The issue with IReportServerCredentals is the application must deal with the credentials of the trusted account, including the password. For added level of security, I try my best to avoid handling passwords and use Windows authentication whenever I can. Therefore, my preferred approach is to change the process identify of the web application. One way to do this is to change the identity of the IIS application pool the web application is running under, as follows:
- If you don’t have a domain account to use as a trusted account, create a new domain account.
- On the web server, add the account to the IIS_WPG local Windows group to give it the necessary rights to be used as an application pool account.
- In the IIS Manager, expand the server name, right-click the Application Pools folder, and click New Application Pool.
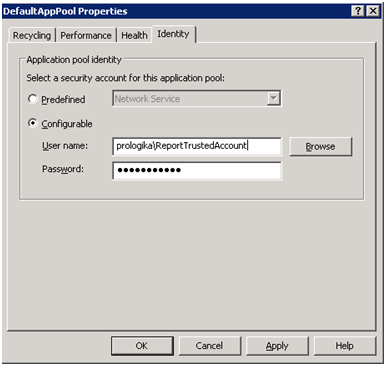
- Give the new pool a name. In the pool Properties page, click the Identity tab, select the Configurable option, and enter the credentials of the trusted account.

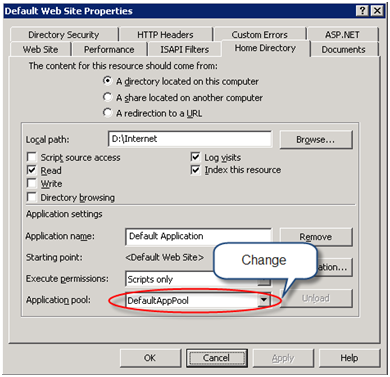
- Open the web application properties and change its application pool to the pool you just created.
- If present, remove <identity impersonate=”true”/> element from the application web.config file so the network calls are made under the process identify instead of the anonymous user account, such as IUSR_<MACHINE_NAME>.
- At this point, if you run the web application, you may get a permission error because the domain account doesn’t have the necessary rights to specific folders, such as the web application folder and the temp folder. Using Windows Explorer, grant the domain account (or IIS_WPG group) rights to these folders. The error message should include the path of the folder you need to grant access to.
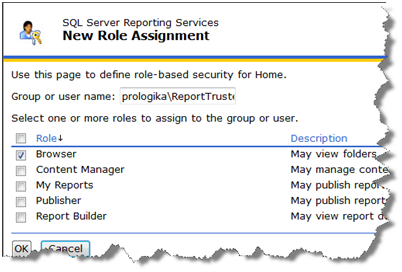
- Finally, use the Report Manager to grant the necessary rights to the trusted account, such as Browser, to the required folders.